
Replacing an Airgate Piston
Follow these steps to replace an air-gate piston.
System A: Dual Proxy version
Be sure to pick the correct maintenance procedure depending on the Position Detection System installed on your machine (System A / System B).
Personal Protective Equipment
- Rubber dipped work gloves
- Nitrile gloves
- Safety glasses


Timeframe
- Estimated total: 1 man-hour
Procedure
-
Switch BioDryer to “HAND” Mode Use the switch on the electrical panel to set it to “HAND” position. (see Figure 1)
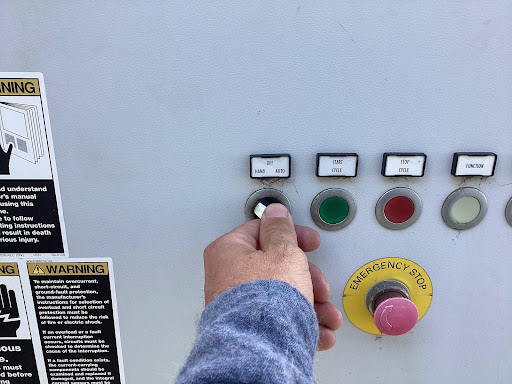
Figure 1 -
Rotate BioDryer into Position Hold down the green “START CYCLE” button to rotate the biodryer until the airgate is within range. (see Figure 2)
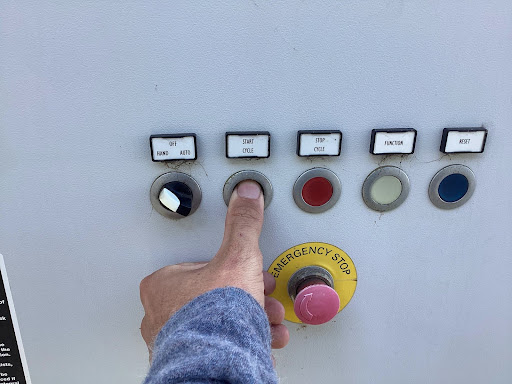
Figure 2 -
Initiate LOTO Procedure Turn the main switch on the electrical panel to the “OFF” position to terminate power to the biodryer.
-
Discharge Pneumatic System Locate the pneumatic OFF/ON knob on the biodryer air structure. Push and twist it clockwise from “SUP” to “EXH” to release pressure. (see Figure 3)
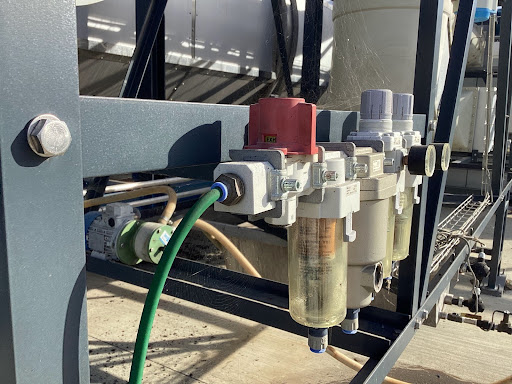
Figure 3 -
Remove Pneumatic Hoses and Proximity Sensors Remove the two pneumatic hoses from the quick disconnect fittings on the piston. Next, cut the zip-tie fastening the proximity sensor cables to the piston. Using the flathead screwdriver, remove the two pipe clamps securing the proximity sensors to the piston.
warningBe sure to note the correct orientation of the pneumatic pipes and proximity sensors before removal to ensure they are reinstalled in the correct positions.
-
Remove Airgate Hatch Plate Using a 10mm socket wrench, remove the outer 16 bolts and washers from the hatch plate. (see Figure 4)
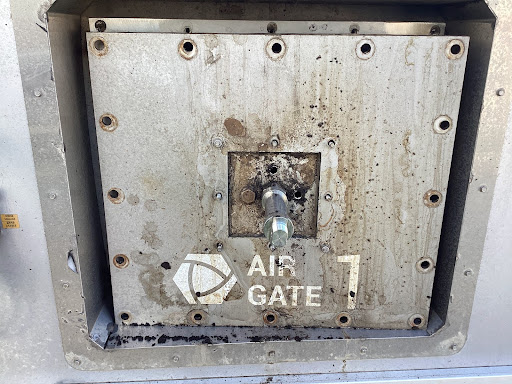
Figure 4 -
Remove Piston Mount Plate Using a 10mm socket wrench, remove the inner eight nuts and washers securing the piston housing plate to the airgate hatch plate. Remove the airgate hatch plate and set aside. Be cautious to not let the piston assembly fall into the body of the dryer. (see Figure 5)
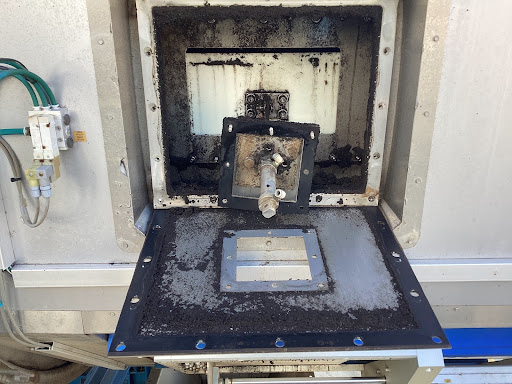
Figure 5 -
Vacuum Out Excess Material Use a vacuum to remove all material stuck in the air duct. (see Figure 6)
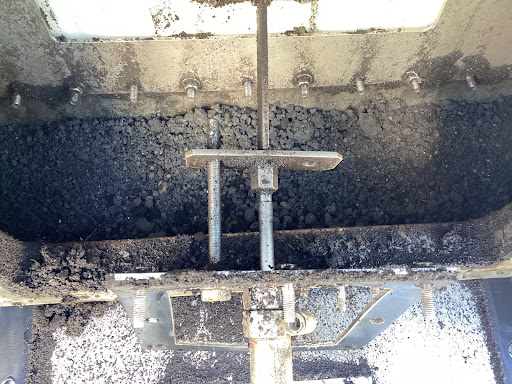
Figure 6 -
Remove Piston Actuation Rod Use pliers to un-thread the piston's actuation rod from the plastic plate rod. (see Figure 7)
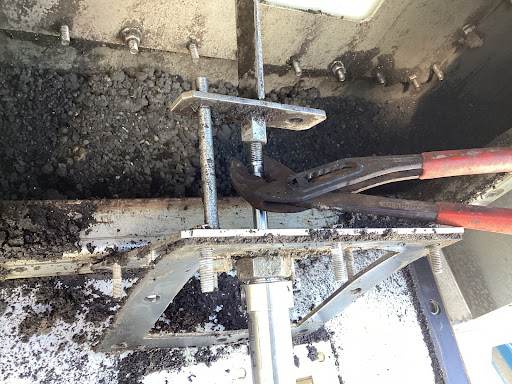
Figure 7 -
Remove Piston from Mount Plate By hand, un-thread the piston from the mounting plate.
-
Install Pneumatic Fittings Remove pneumatic fittings from the old piston and install them on the new piston.
-
Install New Piston on Mount Plate Remove both nuts from the new piston (these will not be used). Thread the new piston snug onto the piston mount plate.
-
Connect Piston Actuation Rod Extend the actuation rod by hand. Using pliers, thread the piston actuation rod onto the plastic plate rod.
warningEnsure the set bolt on the piston mount plate is in the hole of the plastic plate’s rod plate to prevent unthreading during operation.
-
Mount the Piston Mount Plate Using a 10mm socket wrench, fasten the airgate hatch plate to the piston mount plate with the (8) nuts and washers.
-
Mount the Airgate Hatch Plate Using a 10mm socket wrench, fasten the airgate hatch plate to the body of the biodryer with the (16) bolts and washers.
-
Connect Pneumatic Hoses and Proximity Sensors Fasten the proximity sensors back onto the piston with the pipe clamps, securing them as close to each end of the piston as possible. Secure any sensor cable slack with a zip-tie. Connect the pneumatic hoses back into the fittings.
-
Resupply Pneumatic Air System Push down and rotate the red OFF/ON knob counterclockwise from “EXH” to “SUP” to re-pressurize the pneumatic lines.
-
Remove LOTO Re-energize the biodryer by turning the main switch on the electrical panel to the “ON” position. Reset the 24v components by pressing the blue button until the light is no longer illuminated.
-
Set BioDryer to Auto Mode
Use the switch on the electrical panel to turn it to the “AUTO” position.
Figures
Figure #1
Figure #2
Figure #3
Figure #4
Figure #5
Figure #6
Figure #7
System B: Transducer version
Be sure to pick the correct maintenance procedure depending on the Position Detection System installed on your machine (System A / System B).
Personal Protective Equipment
- Rubber dipped work gloves
- Nitrile gloves
- Safety glasses
Timeframe
- Estimated total: 1 man-hour
Procedure
-
Switch BioDryer into “MANUAL” Mode Using the switch on the air skid electrical panel, turn the switch into “MANUAL” position. (see Figure 1)
Figure 1 -
Rotate BioDryer into Position Hold down the green button to rotate the biodryer until the airgate is within range to perform the task. (see Figure 2)
Figure 2 -
Initiate LOTO Procedure Terminate power to the biodryer by turning the main switch on the Biodryer electrical panel to “OFF” position.
-
Discharge Pneumatic System Locate the pneumatic OFF/ON push button on the biodryer air structure. Pull up to release all pressure in pneumatic lines. (see Figure 3)
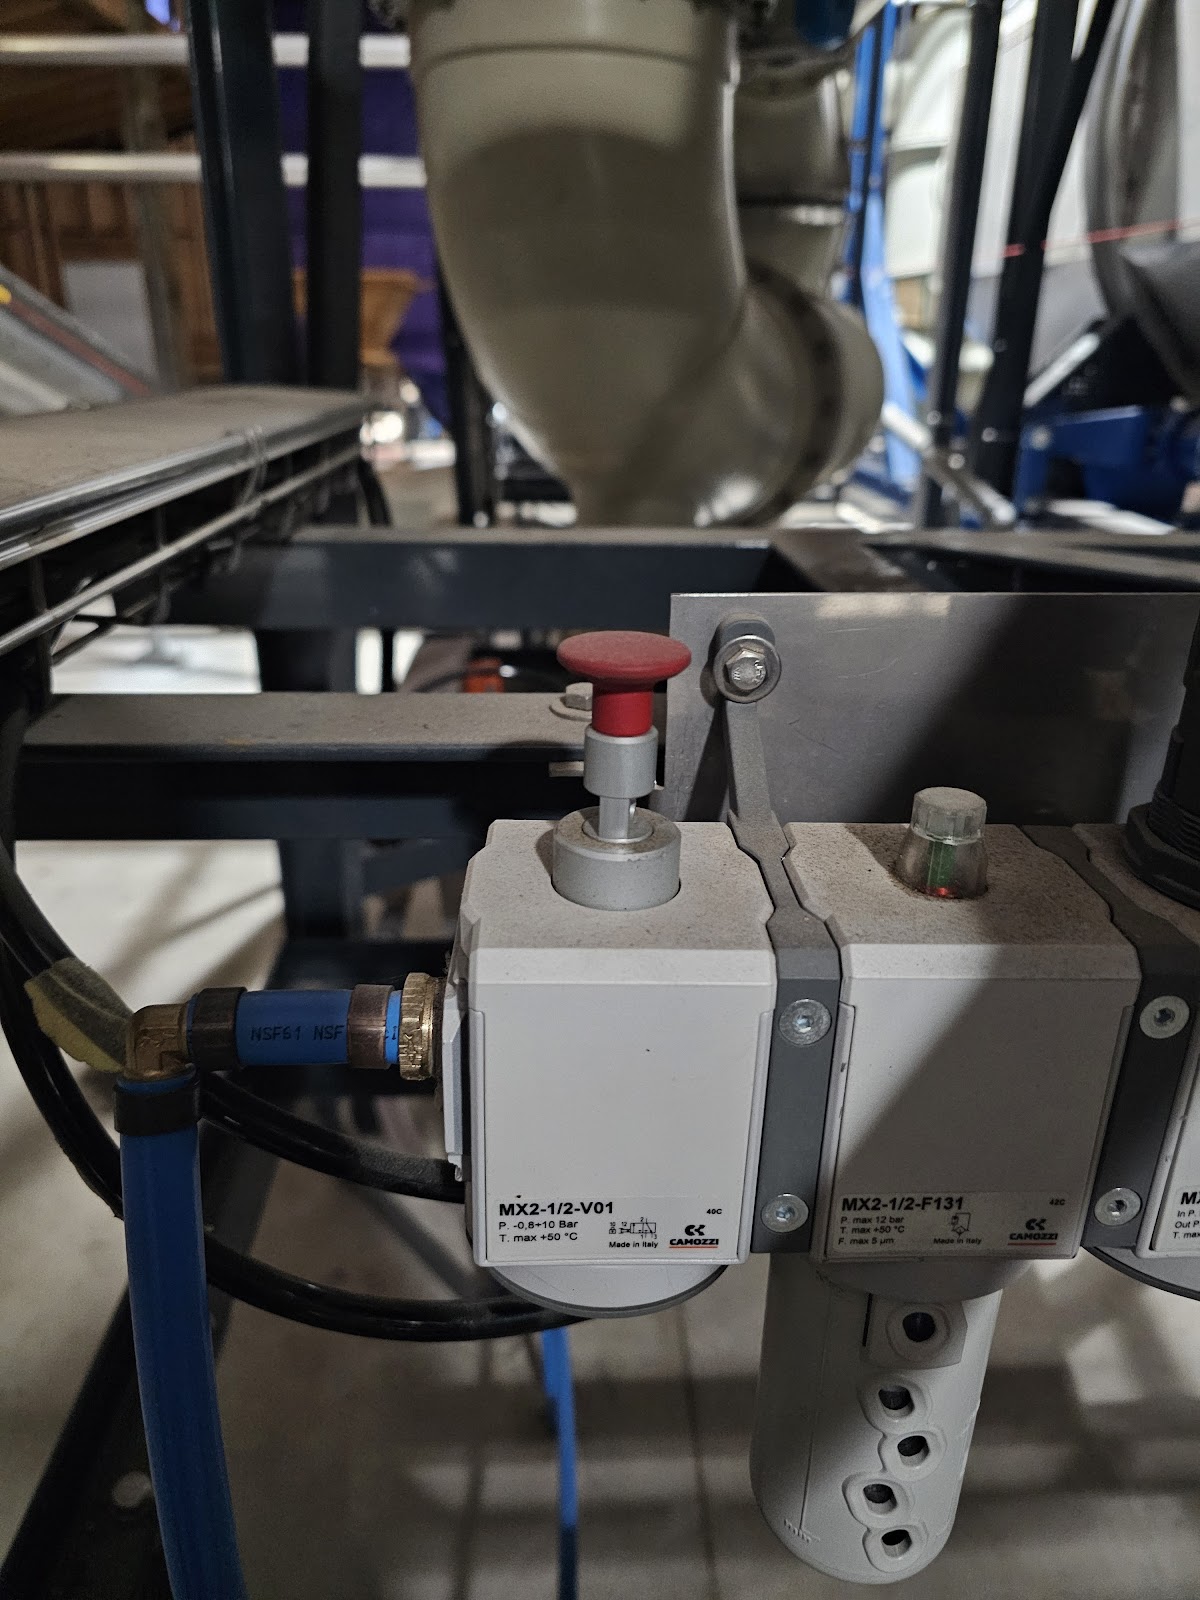
Figure 3 -
Remove pneumatic hoses Remove the (2) pneumatic hoses from the quick disconnect fittings on the piston. Be sure to note the correct orientation of the pneumatic pipes before removal to ensure they are reinstalled in the correct positions. Remove quick disconnect electrical wire. (see Figure 4)
warningBe sure to note the correct orientation of the pneumatic pipes before removal to ensure they are reinstalled in the correct positions.
-
Remove Airgate Hatch Plate Using a 10mm socket wrench, remove the outer (16) bolts and washers from the hatch plate. (see Figure 4)
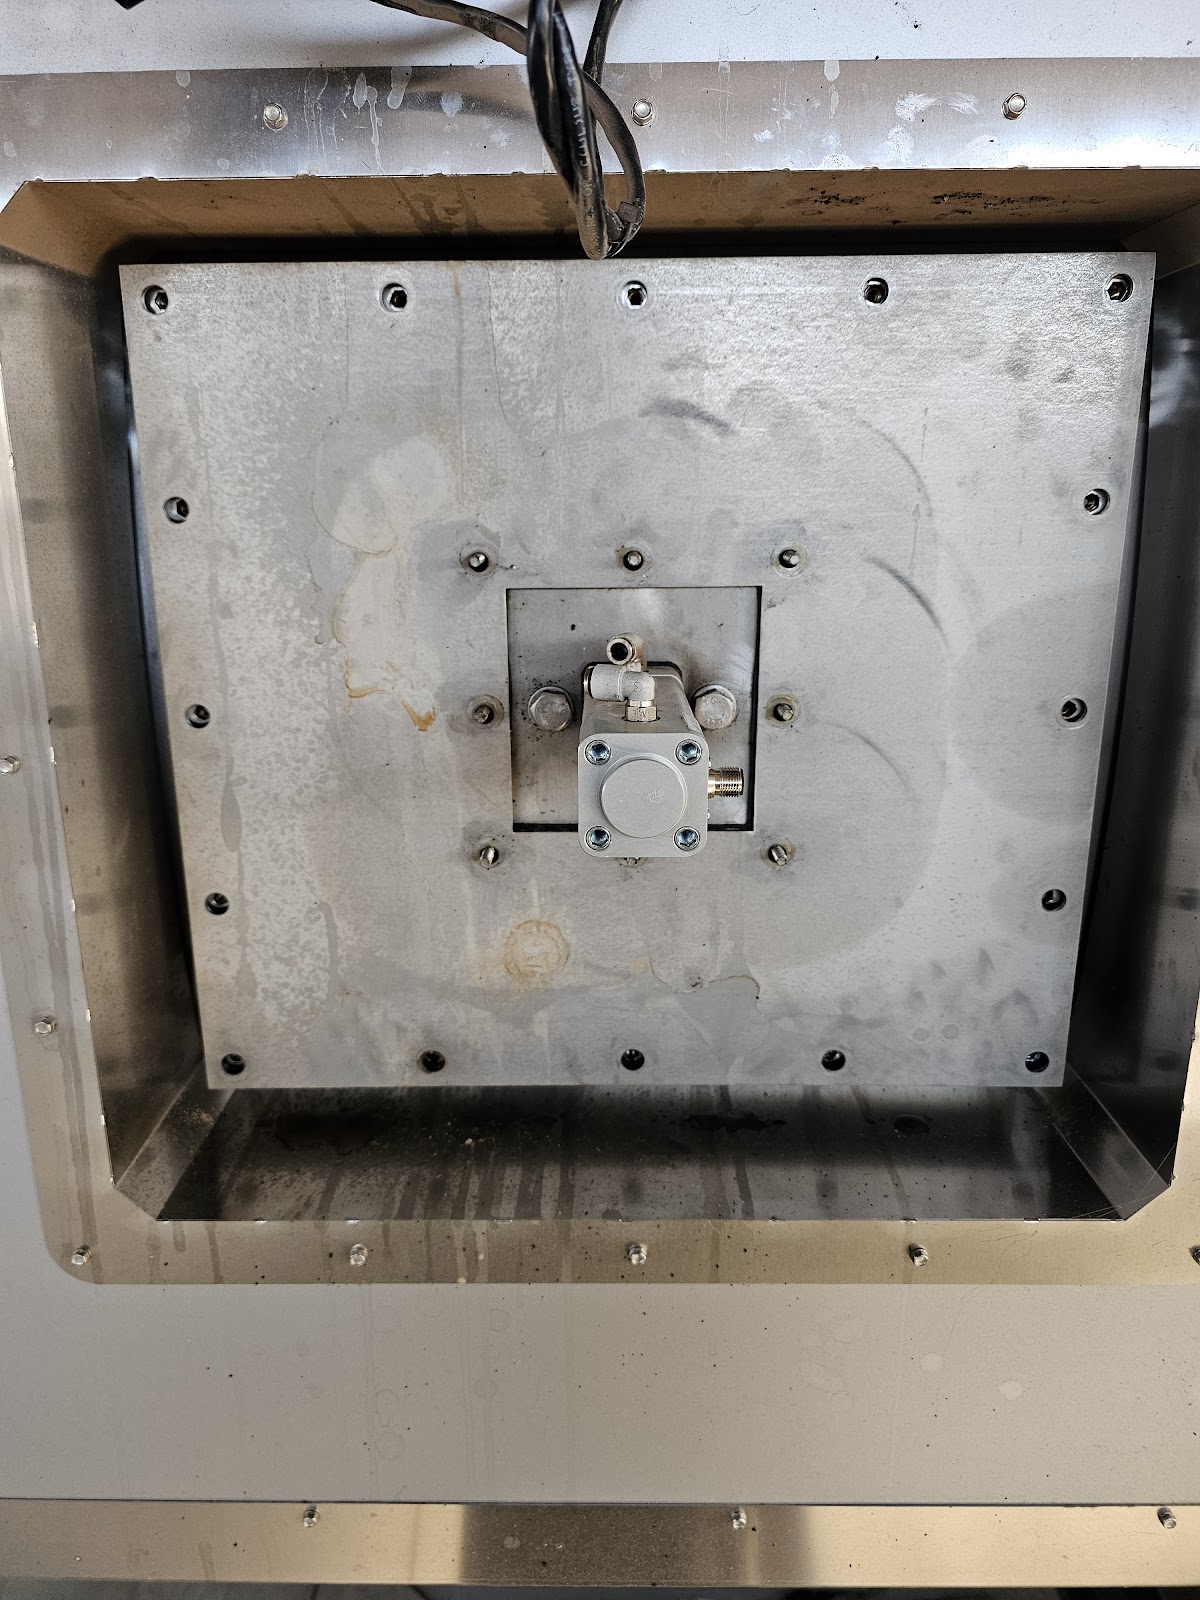
Figure 4 -
Remove Piston Mount Plate using a 10mm socket wrench, remove the inner (8) nuts and washers securing the piston housing plate to the airgate hatch plate. Remove the airgate hatch plate and set aside. (see Figure 5) Do not let the piston assembly fall into the body of the dryer. Remove the entire piston assembly. (see Figure 6)
warningDo not let the piston assembly fall into the body of the dryer.
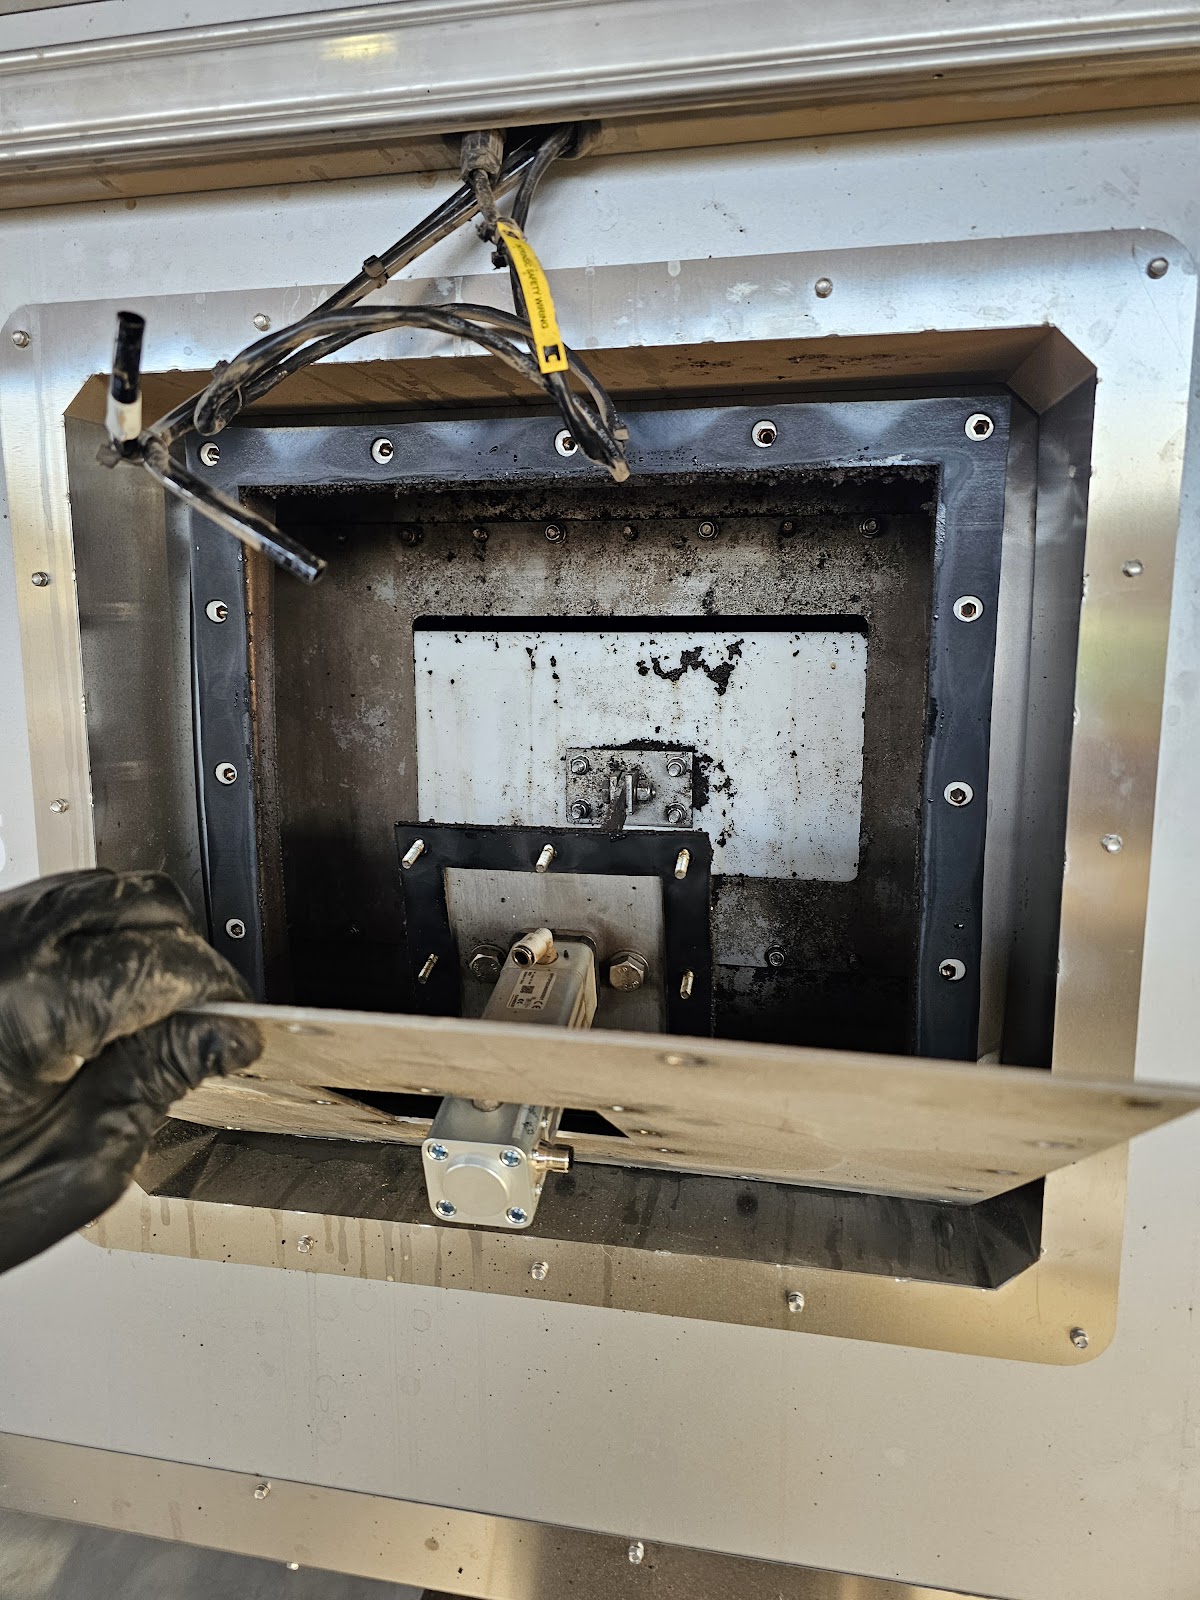
Figure 5
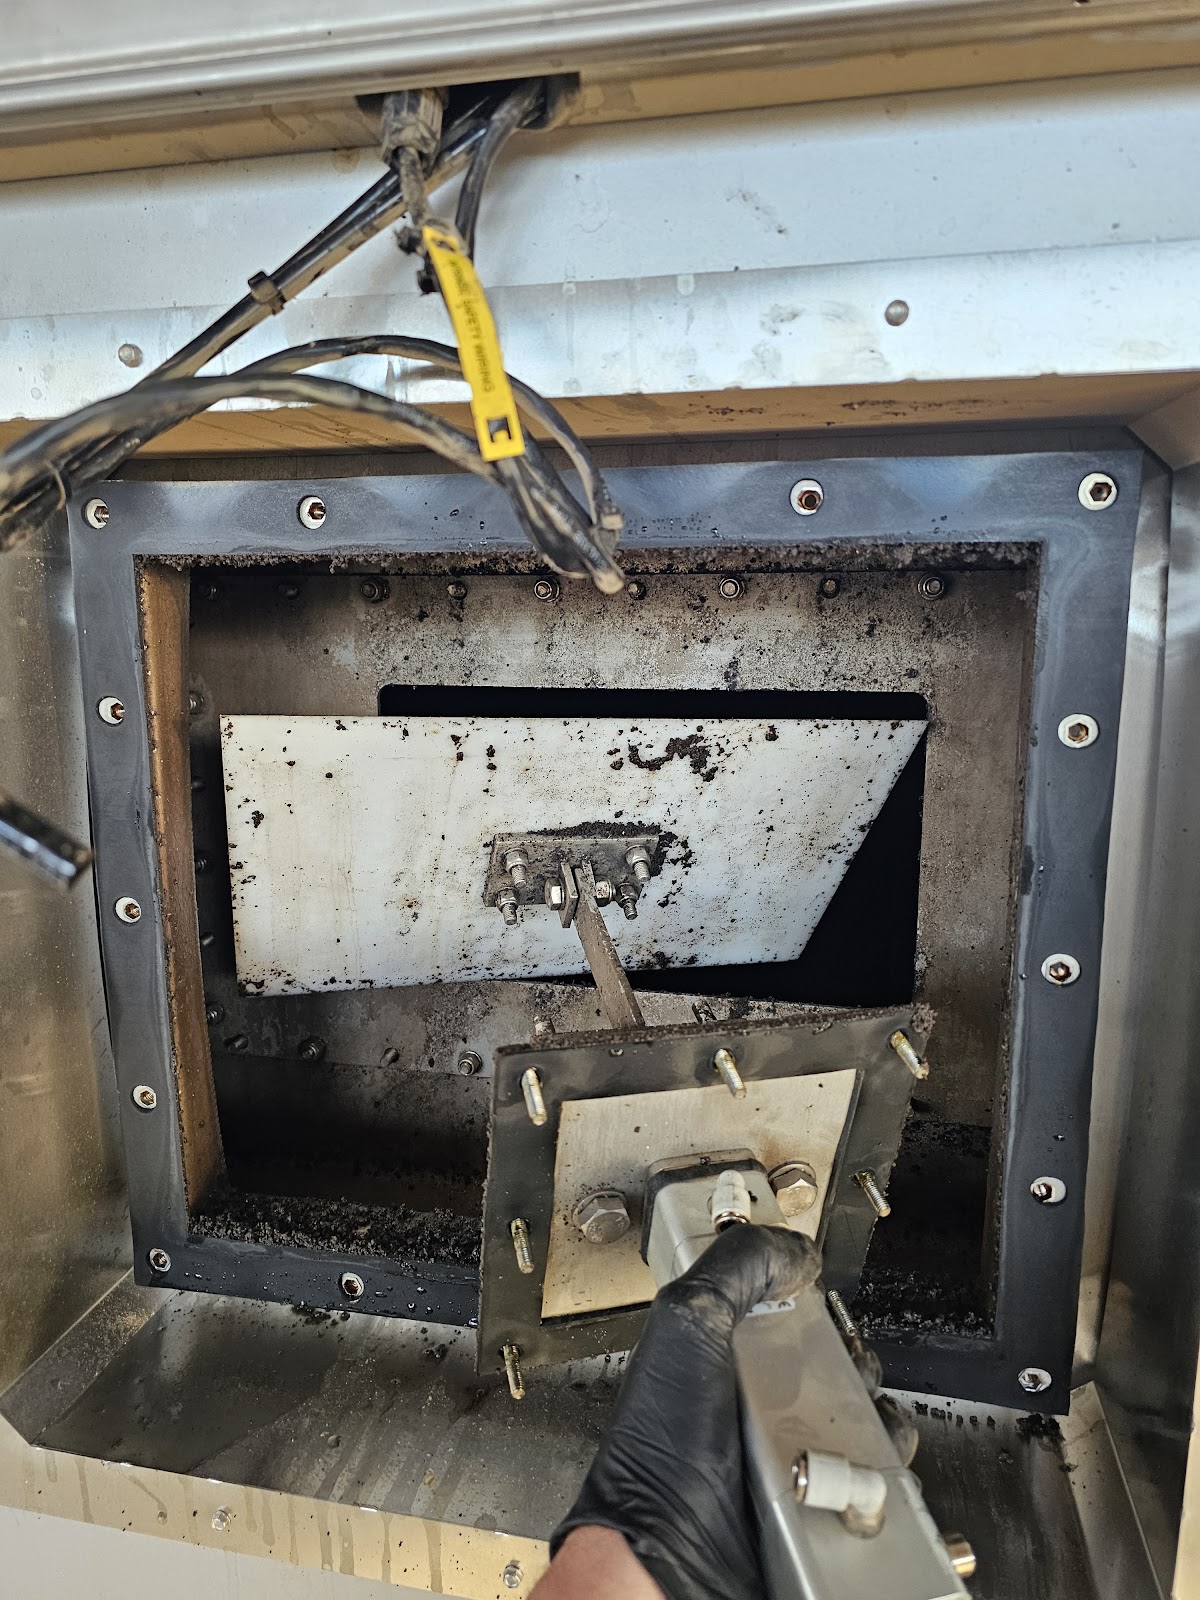
Figure 6
-
Vacuum Out Excess Material Use a vacuum to remove all material stuck in the air duct. (see Figure 7)
Figure 7 -
Remove Piston Actuation Rod Using pliers and a 13mm wrench, un-thread the piston actuation rod from the plastic plate bracket. Be sure to keep the nut and washer to re-install on the new piston rod. (see Figure 8 and 9)
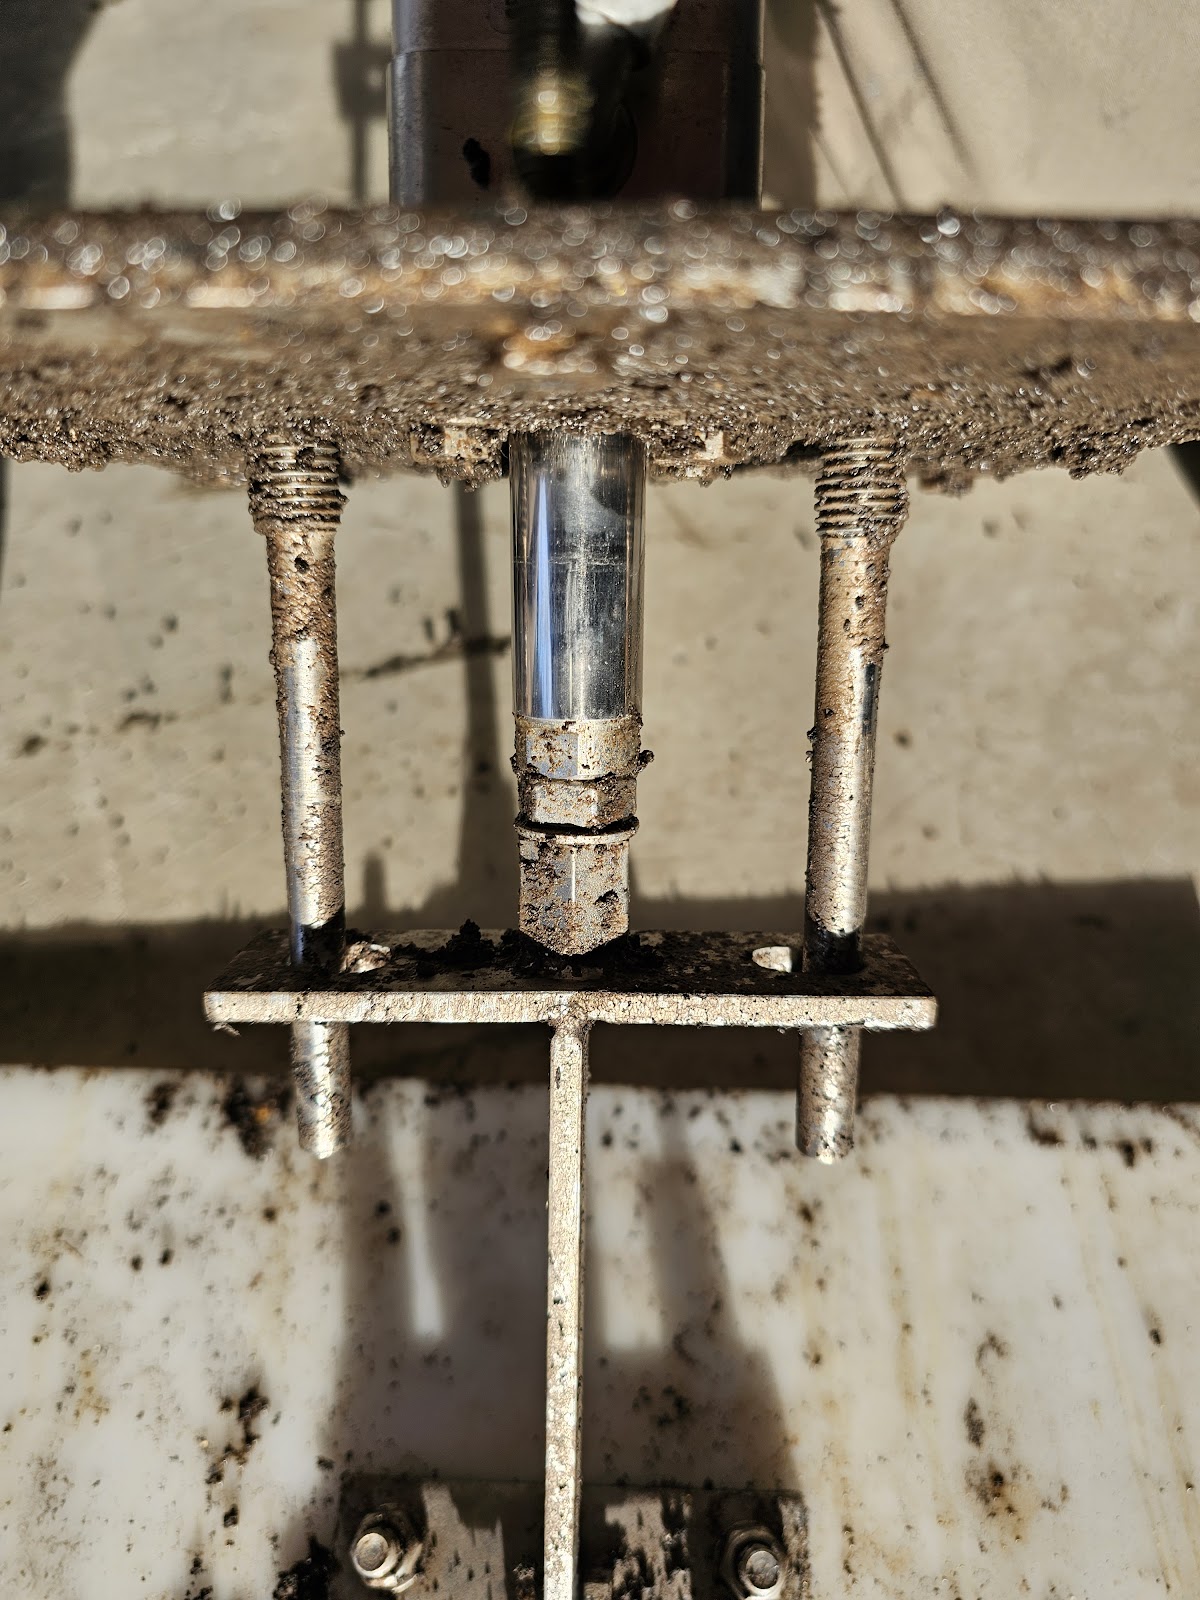
Figure 8
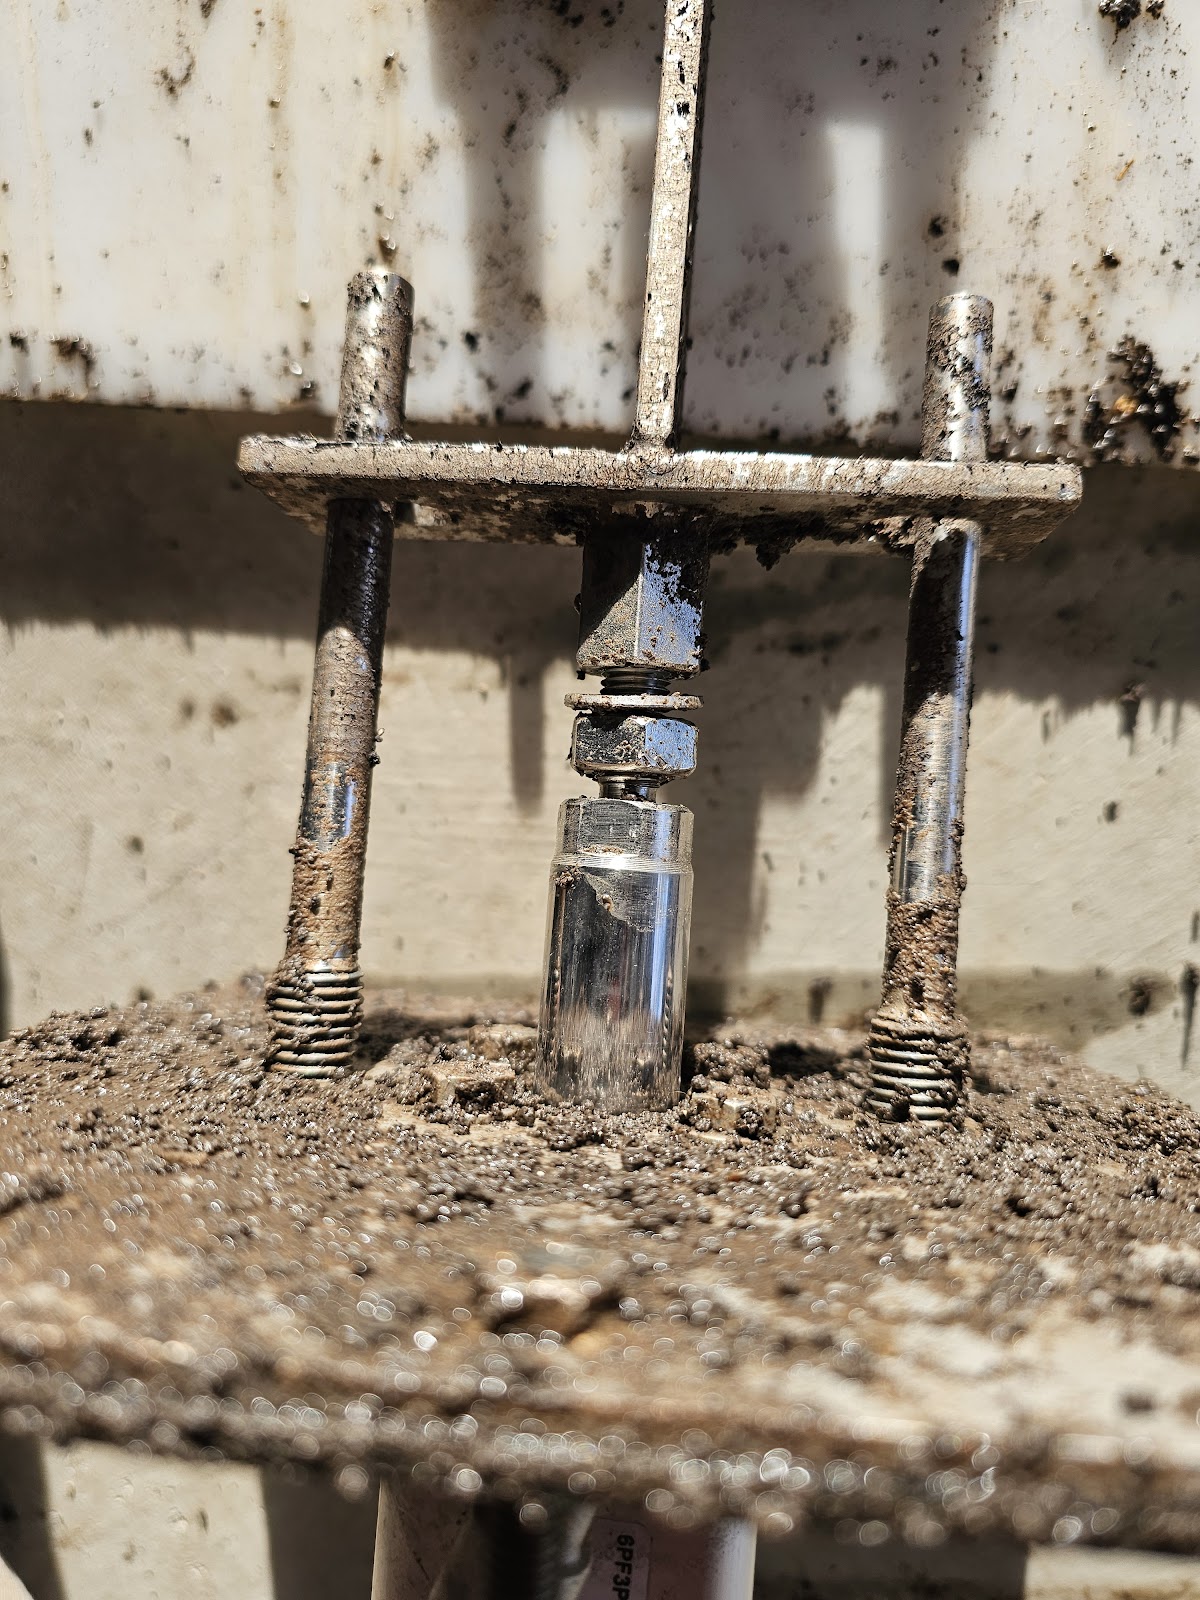
Figure 9
- Remove Piston Using a 13mm wrench, remove the (4) bolts mounting the piston to the plate. (see Figure 10)
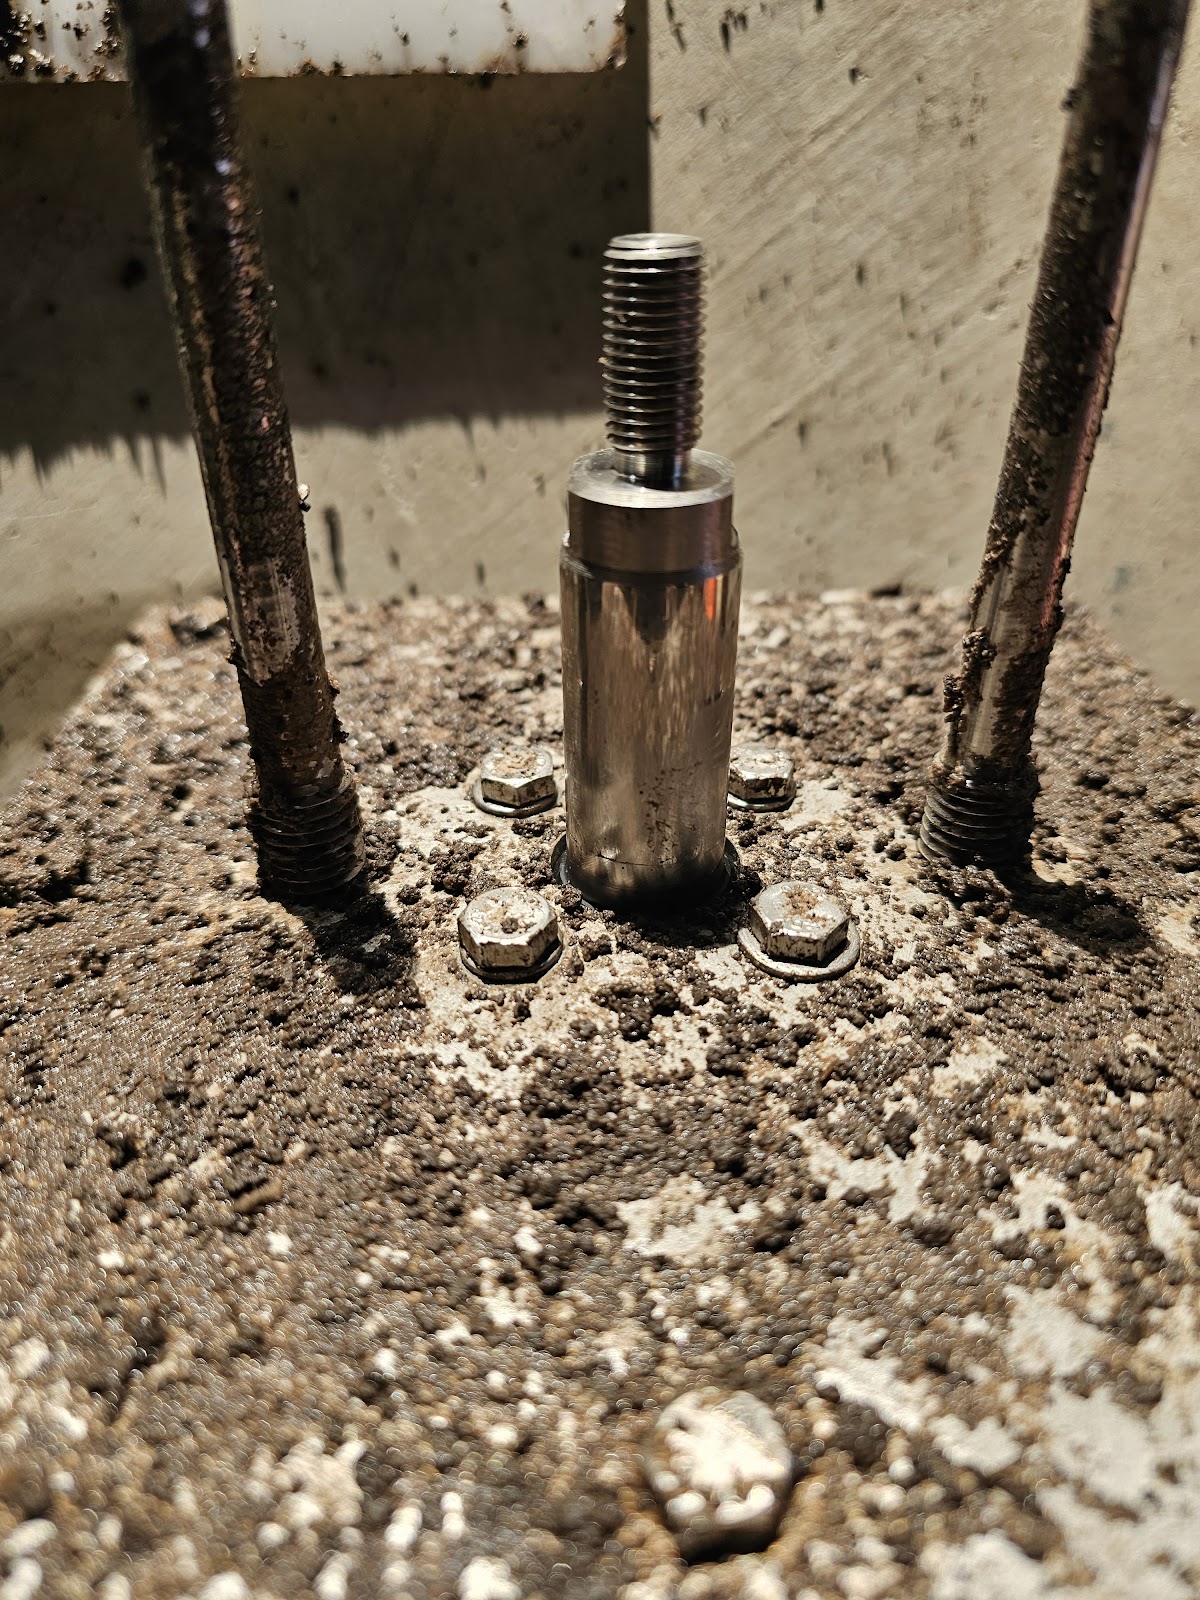
Figure 10
- Remove plates, gasket and seal Remove plates, gasket and seal from the piston rod. Clean these thoroughly and ensure a new ring seal isn’t necessary. (see Figure 11 and 12)
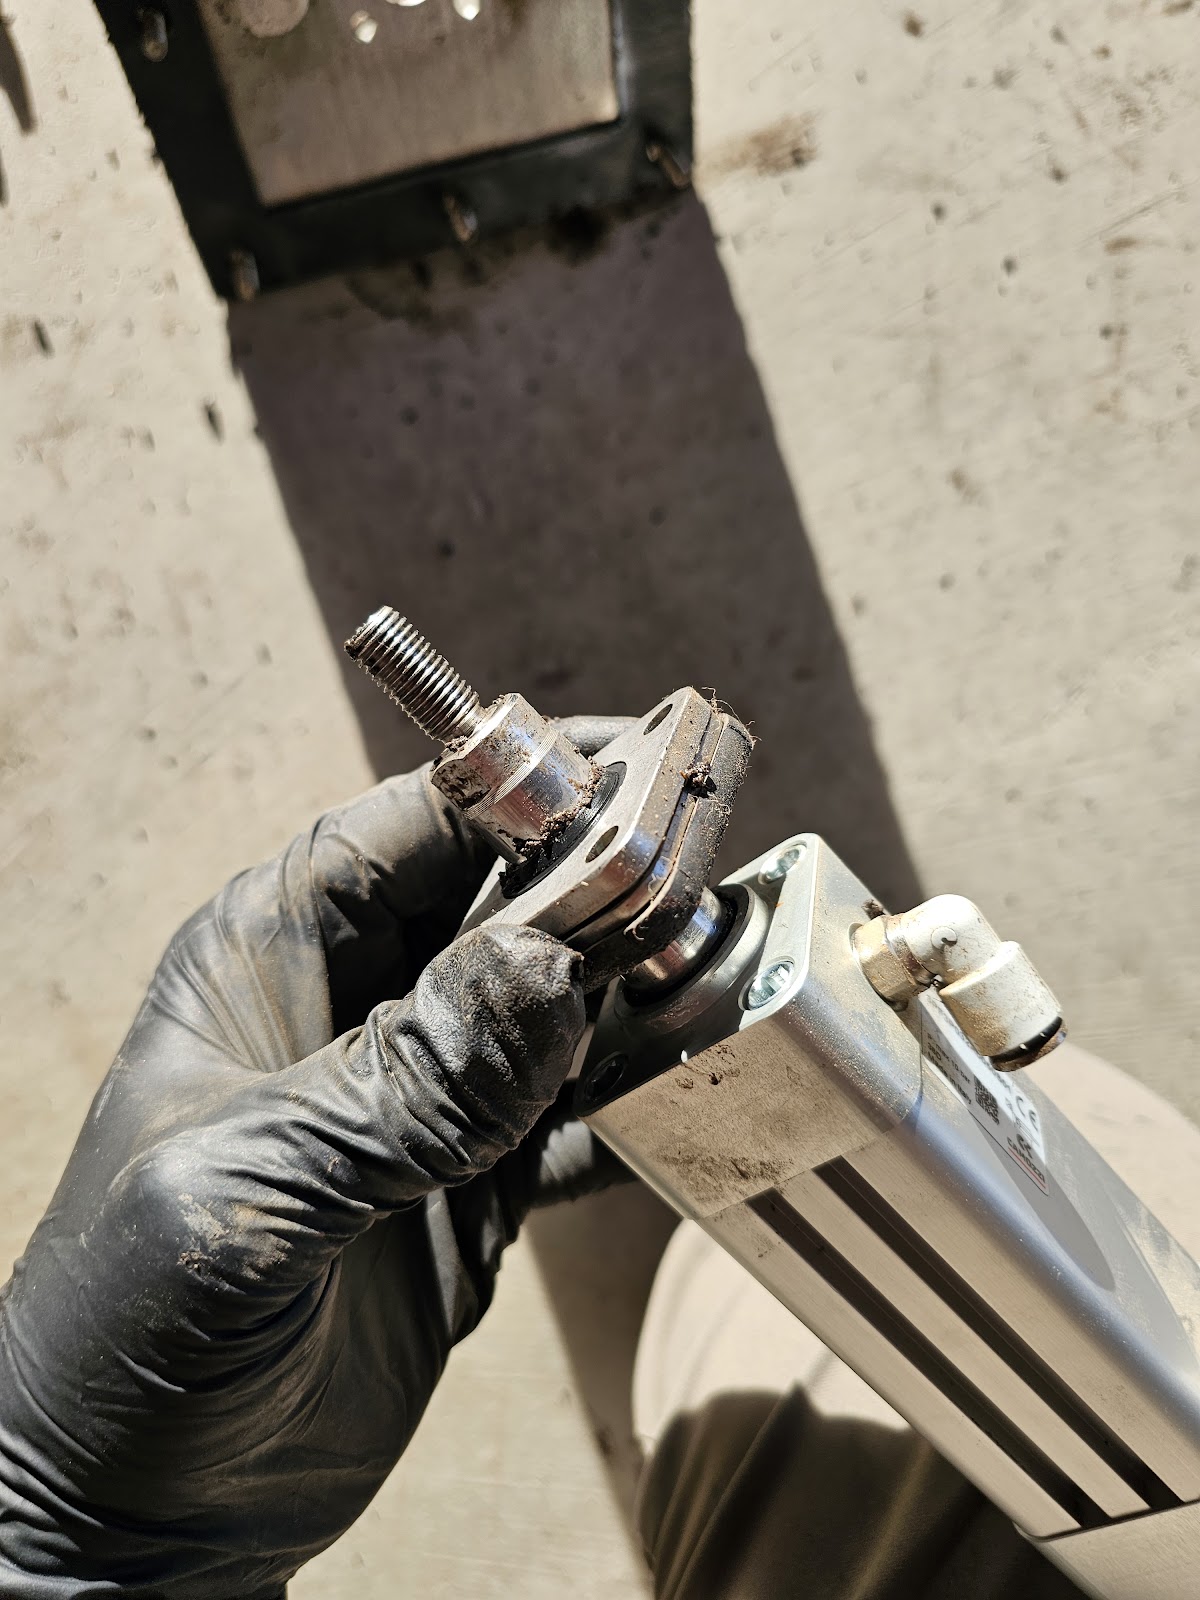
Figure 11
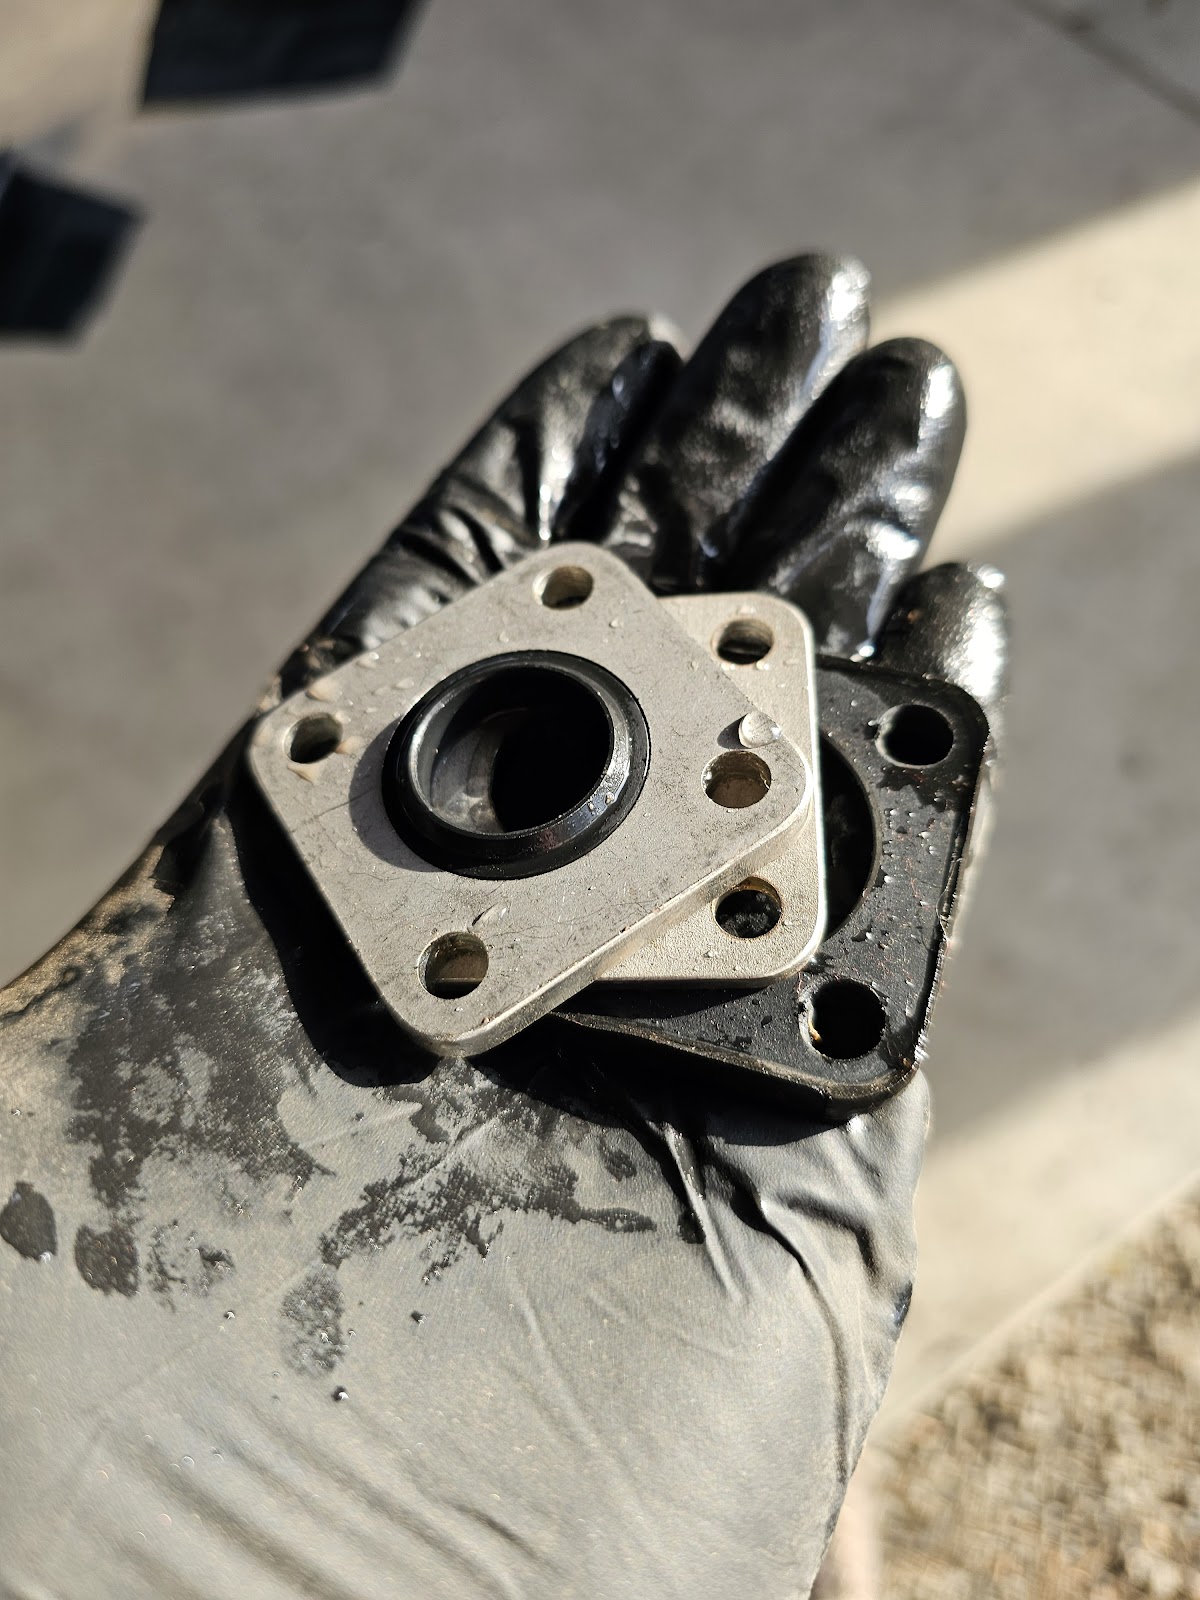
Figure 12
-
Prepare the new piston Remove pneumatic fittings from the old piston and install them on the new piston. Re-install the cleaned plates, gasket and seal back onto the piston rod.
-
Install new piston on mount plate Re-using the (4) bolts, mount the new piston back on the plate.
-
Connect piston actuation rod Extend the actuation rod by hand. Re-fit the nut and washer on the rod threads. Apply blue threadlocker to the piston rod threads. Using pliers and a 13mm wrench, thread the piston rod onto the plastic plate rod.
Ensure both set bolts on the piston mount plate are in the holes of the plastic plates’ rod plate. This prevents the plastic plate rod from unthreading and falling into the biodryer during operation.
-
Mount the piston mount plate Using a 10mm socket wrench, fasten the airgate hatch plate to the piston mount plate with the (8) nuts and washers.
-
Mount the airgate hatch plate Using a 10mm socket wrench, fasten the airgate hatch plate to the body of the biodryer with the (16) bolts and washers.
-
Connect pneumatic hoses and quick connect cable
-
Resupply pneumatic air system Push down and rotate red OFF/ON knob counterclockwise from the “EXH” to the “SUP” position to re-pressurize the pneumatic lines.
-
Remove LOTO Re-energize the biodryer by turning the main switch on the electrical panel to the “ON” position. Reset the 24v components by pressing the blue button until the light is no longer illuminated.
-
Set BioDryer to Auto Mode
Use the switch on the electrical panel to turn it to the “AUTO” position.
Figures
Figure #1
Figure #2
Figure #3
Figure #4
Figure #5
Figure #6
Figure #7
Figure #8
Figure #9
Figure #10
Figure #11
Figure #12