
Cleaning a Sludge Gate
Please follow these steps for safe cleaning of a BioDryer sludge gate.
Personal Protective Equipment
- Nitrile gloves


Timeframe
- Estimated total: 1 man-hour
Procedure
-
Switch BioDryer to “HAND” Mode: Use the switch on the electrical panel to set it to “HAND” position. (see Figure 1)
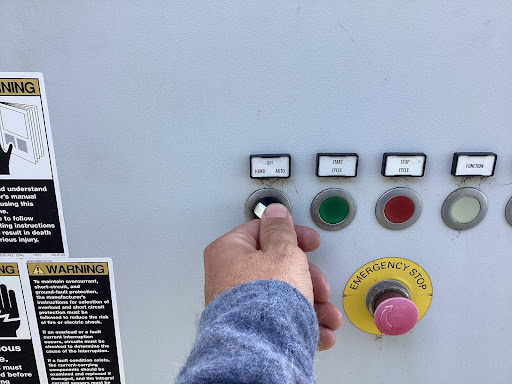
Figure 1 -
Rotate BioDryer into Position: Hold down the green “START CYCLE” button to rotate the biodryer until the sludge gate is within range. (see Figure 2)
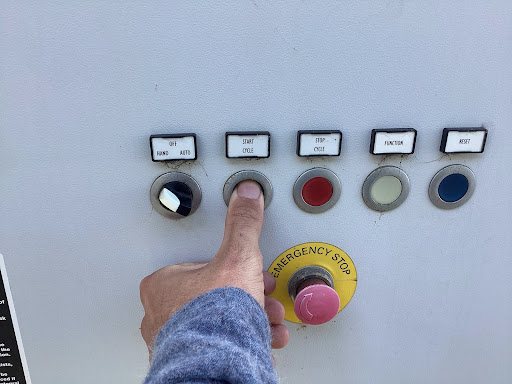
Figure 2 -
Initiate LOTO Procedure: Terminate power to the biodryer by turning the main switch on the electrical panel to the “OFF” position.
-
Discharge Pneumatic System: Locate the pneumatic OFF/ON knob on the biodryer air structure. Push and twist it clockwise from “SUP” to “EXH” to release pressure. (see Figure 3)
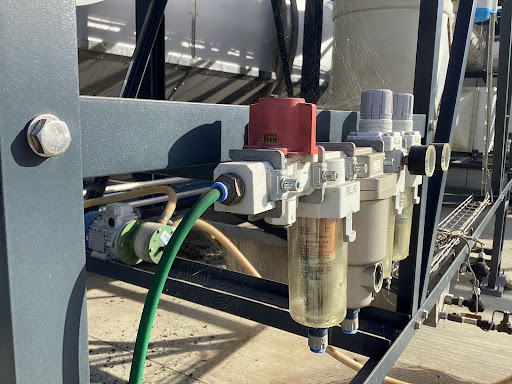
Figure 3 -
Remove Frame: Using an 8mm hex key, remove the (7) bolts from the gate frame. (see Figures 4 & 5)
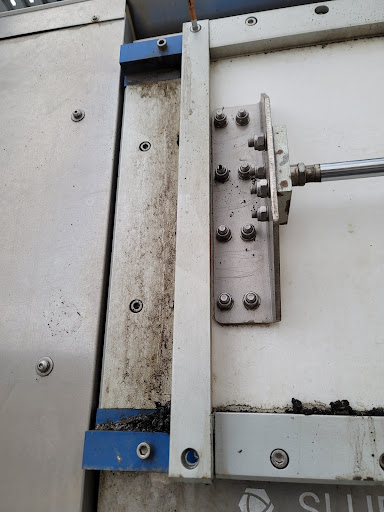
Figure 4
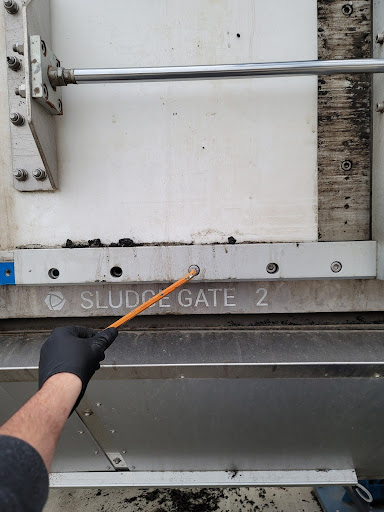
Figure 5
- Remove Piston Rod: Use an 8mm hex key and a 17mm wrench to detach the piston from the mounting plate. Remove the o-ring and set it aside. (see Figures 6, 7 & 8)
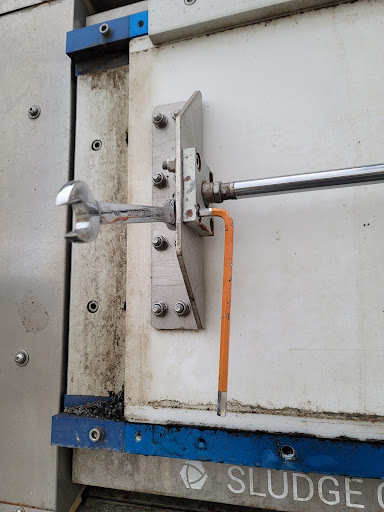
Figure 6
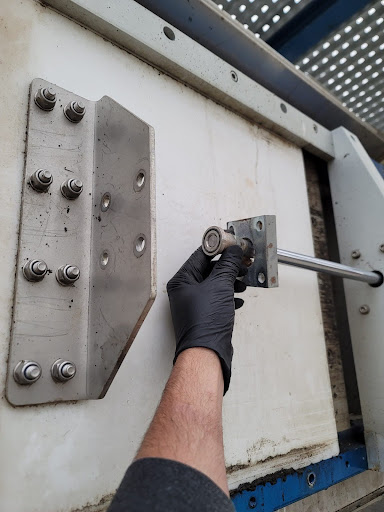
Figure 7
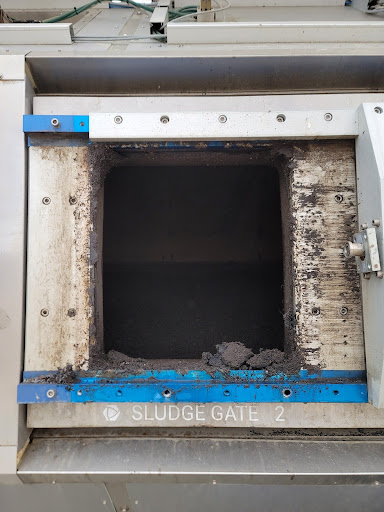
Figure 8
-
Remove Sludge Gate:
CautionUSE CAUTION! GATE IS HEAVY
Tilt the bottom of the sludge gate towards you to remove it from the channel.
-
Clean Channels: Use a rag to thoroughly clean the top and bottom channels of all material.
-
Scrape Raised Corroded Areas: Use a chisel or scraper to remove corrosion. Once cleaned, expect to see deep surface pitting in the aluminum. (see Figures 9 & 10)
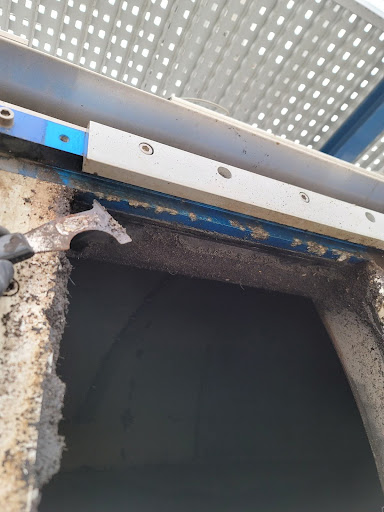
Figure 9
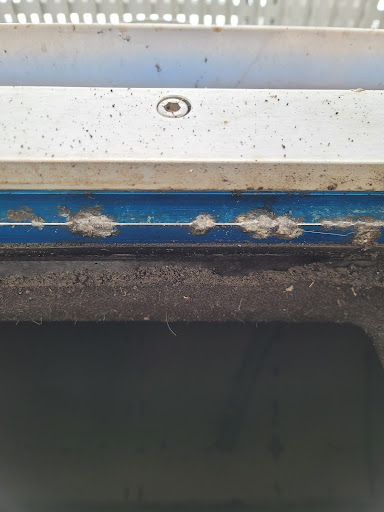
Figure 10
-
Apply Lubricant: Apply a generous amount of PTFE dry lubricant to the top and bottom channels.
-
Reinstall Sludge Gate: Reattach the sludge gate to the piston rod using an 8mm hex key and a 17mm wrench. Ensure correct orientation and replace the o-ring.
-
Reinstall Frame: Reinstall the lower horizontal and vertical pieces of the frame using an 8mm hex key. Ensure bolts are placed correctly, with deeper recessed holes indicating locations for longer bolts.
-
Reposition Gate: Manually slide the gate into the closed position.
-
Resupply Pneumatic Air System: Push down and rotate the red OFF/ON knob counterclockwise from “EXH” to “SUP” to re-pressurize the pneumatic lines.
-
Remove LOTO: Re-energize the biodryer by turning the main switch on the electrical panel to the “ON” position. Reset the 24v components by pressing the blue button until the light is no longer illuminated.
-
Set BioDryer to Auto Mode: Use the switch on the electrical panel to set it to the “AUTO” position.
Figures
Figure #1
Figure #2
Figure #3
Figure #4
Figure #5
Figure #6
Figure #7
Figure #8
Figure #9
Figure #10