
Twenty-four Month Maintenance
For A Complete List with other Time Frames See Section:
Complete Maintenance Schedule
To maintain optimal operational efficiency, it's crucial to consistently follow maintenance schedules from both past and current time periods.
Operations to be performed every Two Years
Estimated total man-hours of downtime: 1950 minutes per BioDryer (32.5hr's)
The time estimate above accounts for the prior time period's operations and includes the operations for the current time period.
| Section | Description | Time Estimate (man hours) | LOTO? |
|---|---|---|---|
| Air System | Replace air-to-air heat exchanger | 4 hours | LOTO is Required |
Replace Air to Air Heat Exchanger
The heat exchanger plays a vital role in transferring heat between air streams, and over time, wear and tear can impact its performance. By replacing it when needed, we ensure our system continues to operate optimally, preventing energy waste and enhancing overall efficiency. This task might seem technical, but it's a necessary step in keeping our equipment running smoothly. Regular replacements contribute to sustained performance and help avoid potential disruptions in the functionality of our system.
Personal Protective Equipment


Timeframe
- Estimated total of 4 man hours to complete.
Procedure
-
Safety First
- Put on the PPE to protect yourself from any potential hazards.
-
Turn off any BioDryer Cycles
- If a process (drying, loading, or unloading) is active, cease it by adhering to the outlined procedure.
-
Remove the PP to heat exchanger hardware
- Loosen the 8mm bolts and nuts on the heat exchanger using a 8mm wrench.
-
Tighten the hardware of PP pipe hangers
- To lift the pipes and remove the weight of the pipes from the heat exchanger tighten the M10 bolts on the all-thread.
- Lifting the pipes and allowing for removal of the Air-to-Air heat exchanger. (see Figures #1 & #2)
-
Remove Air-to-Air HeatEx
- Using a forklift raise the heat exchanger to bring the weight of the heat exchanger off of the below pipes and onto the forklift.
- Once the bottom pipes are detached from the heat exchanger slide the heat exchanger perpendicularly out of the air skid to a safe storage location.
-
Responibly dispose of heat exchanger
- The heat exchanger is made of an aluminium body and can be recycled alongside other aluminium goods.
-
Install the New Heat Exchanger
- Using the forklift and appropriate wrenches follow steps 5 to 2 in reverse order to install the new heat exchanger.
-
Testing Heat Exchanger
- If Lockout-Tagout (LOTO) is engaged, remove it by turning the main switch on the electrical panel to the "ON" position. Reset the 24v components by pressing the blue reset button until the light goes out.
- To test the newly installed heat exchanger put the BioDryer into AUTO mode using your HMI. Then follow the steps under Manual Operations; Start and Stop the Airflow.
- Determine if the replacement was successful by accurate readings of the pressure and temperature sensors.
-
System Activation
- Reactivate the BioDryer to normal operational mode using the Human-Machine Interface (HMI).
Figures:
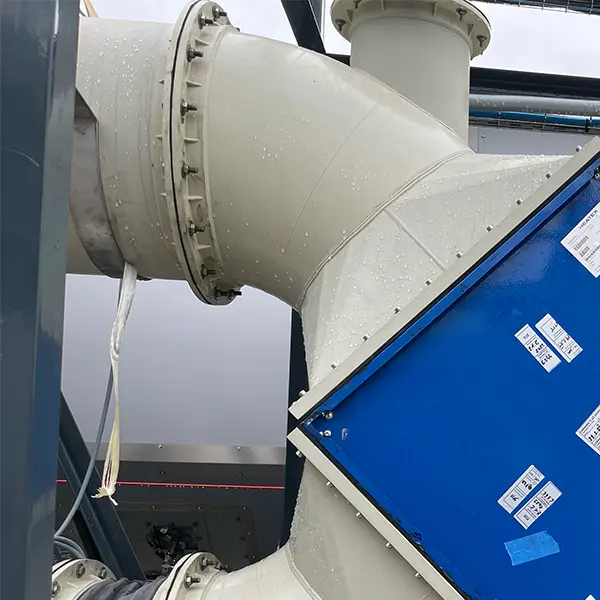
Figure #1
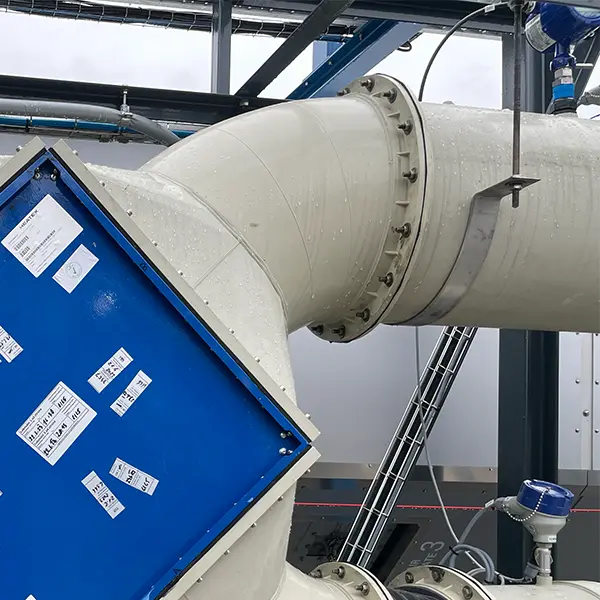
Figure #2